If you use a wooden beehive, it is getting exposed to all of the elements throughout the year, and since these wooden beehives can often be quite expensive, you of course want them to last as long as possible.
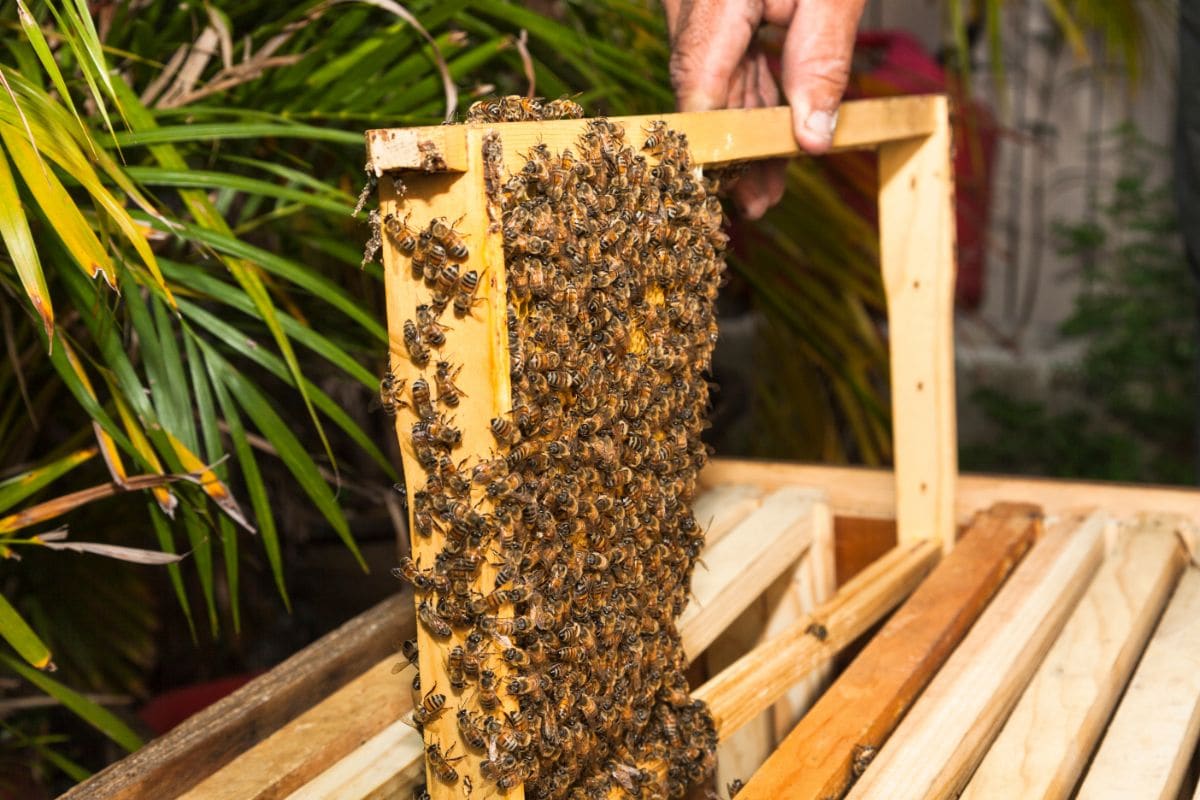
This is why you should consider aiding the preservation of your wooden beehives by considering a protective coating to save having to buy another wooden beehive anytime soon.
One of the most common methods of preserving these beehives is by painting them, this is because it will protect the pine box from any weather damage.
It is worth noting that weather like rain, sun, and snow, will all eventually rot any unprotected wood. This will make visible cracks appear, and the joints of the woodwork will eventually show up.
There are many different methods of protecting your wooden beehives, so this does not happen, but the cheapest and most common method of doing this is simply to paint them.
However, it is worth noting that some specific types of wooden beehives (see also: Different Types Of Beehives) are not worth painting like cedar boxed.
For this type of wooden beehive specifically, since cedar naturally resists the elements a lot better, we recommend using something like tung oil to give the box a more natural look.
This guide aims to give you all the advice and information you need to make an informed decision on whether you want to paint your wooden beehive, and then how to do it, and other related information that you either need to know, or should know before you start work on your wooden beehive!
Should You Be Painting Your Beehives?
Especially if you are working with a pine wooden beehive, then it is especially important to try and paint your hive. The reason for pine being such a common type of wood used in beehives is because it has quite a low cost and is easy to work with.
The main downside of this, is how susceptible this material is to weather damage, usually from excess moisture. Because of this, we recommend painting your wooden beehive as it will extend the life.
If you leave a wooden beehive unpainted, it usually does not last that long, but if it is painted it can last years longer.
It is worth finding out what type of wood your wooden beehive is made from. If it is made from a more expensive wood which can stand up to the elements like cypress or cedar, this is usually clearly advertised and these can work better without a coating.
However, if you cannot find what wood it is made from, it is likely pine, or another wood that will benefit from the painting. But the protection you get from painting a wooden beehive is not the only reason you should be painting them!
For example, if you paint your wooden beehive a light color like white, this will reflect heat from the sun, and this will aid in keeping the hive just a little cooler for the bees.
However, if you are living in a cooler climate, you might want to paint it a darker color to absorb the warmth and help stop the bees from getting too cold.
Also, you can use the colors you paint on the wooden beehives as an identification feature that aids not just you but also the bees. You can also use the color to blend the wooden beehive into the surroundings.
This is particularly important if you do not want the beehive to be the target of any vandals, or if you simply do not want it to stick out too much.
Of course, there is also the obvious aesthetic benefit of painting your beehive, so you can simply paint it because you like how it looks!
What Paint To Use?
Similarly to painting a house, your wooden beehive will be facing all of the elements, so you want it to be protected as well against these elements as possible.
Because of this, choosing the best paint for the job is important since this ensures that you will be getting the best protection and you will not have to waste any time or money reapplying the paint all of the time.
This section will go over our advice for choosing a paint for painting your wooden beehive!
Exterior Grade Latex Paint
One of our top types of paint to go for when painting your beehive is an exterior latex paint. These are a water based paint, and they are specifically designed to be able to put up with temperature changes and can also resist moisture as well.
These paints are made using resins, and this aids the coating from not chipping, fading, or peeling. You can get this paint in a variety of different sheen levels, and colors.
When we are painting a wooden beehive we tend to use a satin or eggshell finish paint. You will find that the higher the level of sheen, the more expensive the paint will be, this is of course a larger investment, but it also makes the paint easier to clean and generally more protective.
It is also recommended that if you have the resources that you prime the hive, so the paint will adhere to the beehive better.
You could also go for an oil based exterior paint as well if you do not want to, or do not have access to the latex version. If you choose oil based paint, this is a more durable choice, however, it will also generally end up costing you more.
It is also a much more difficult paint to clean up since it is oil based not water based like the latex paint. This is why we will recommend latex over oil due to the lower cost and ease of use.
An oil based paint is also more likely to bubble if there is any moisture present inside of the hive which is bothersome.
Low VOC Paint
If you have never heard of VOCs when it comes to paint, VOCs are volatile organic compounds which have a high vapor pressure as well as a low water solubility.
These are often human made chemicals and they are often used when producing paints. These paints will emit gases and being around these gases and inhaling them can have harmful health effects.
These are even more worth avoiding if you are working inside since the concentration will be higher. Even when working outside, try to aim for a low VOC or even zero VOC paint.
Paint Quality
Something else you will want to consider when painting your wooden beehive is the quality of the paint.
The difference in price between paints can sometimes be artificial, but it usually reflects the quality of the paint as well, so getting the best paint will also be reflected in the budget as well.
It is worth noting that even if you are using the best and most expensive paints, your wooden beehive can still be damaged, because of this, we do not recommend going for completely top of the range paints.
This is why we recommend looking for discounted paints in your craft stores, or asking around with friends and family since leftover paint is common after finishing a project.
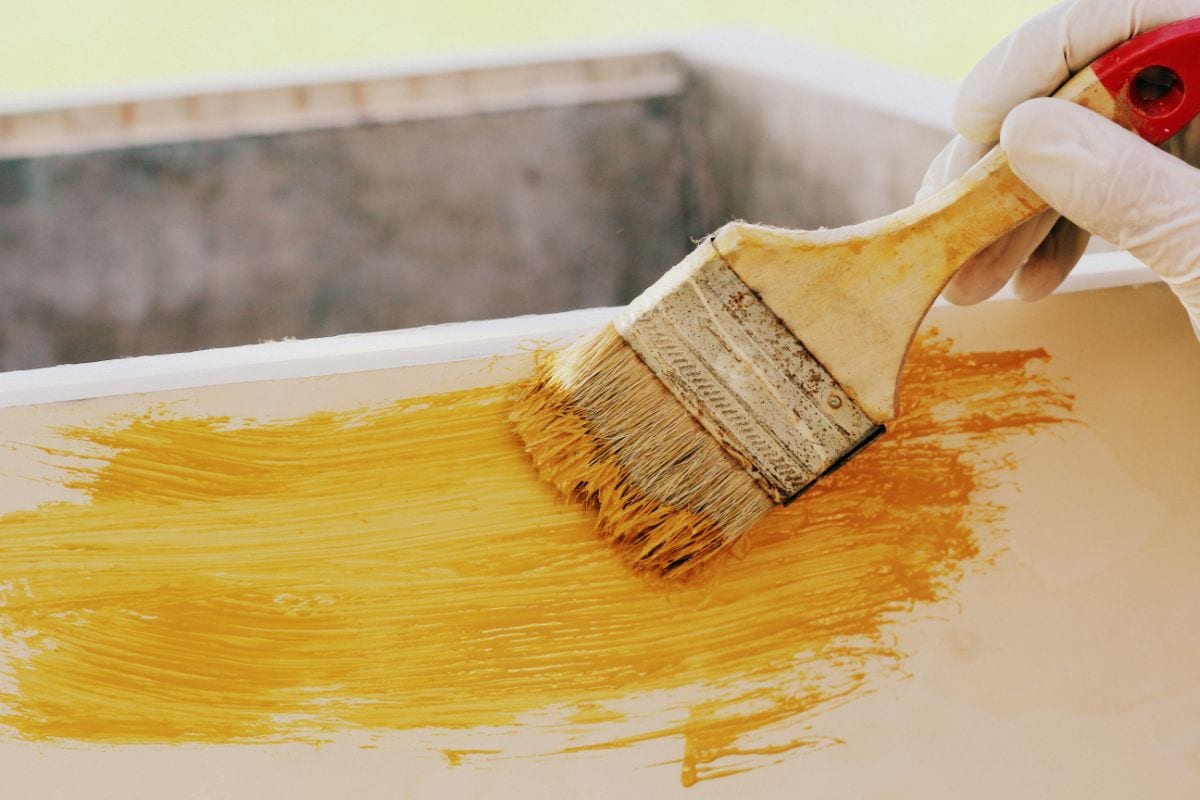
Technique To Paint A Beehive
As you have seen from this guide so far, there is quite a bit of thought that goes into painting your wooden beehive, however, when it comes to the actual act of doing this, it is not that hard.
This section will go over the main tasks you will need to do and occasionally overlook when it comes to painting your beehive, so check through this section closely.
Assembling The Hive
Firstly, you want to assemble the body of the hive, and make sure you are doing this with exterior quality wood glue as well as fasteners like screws or nails.
You want to ensure that the unpainted wooden beehive is stable and secure before painting, and do not try and paint the parts before you actually put the hive together.
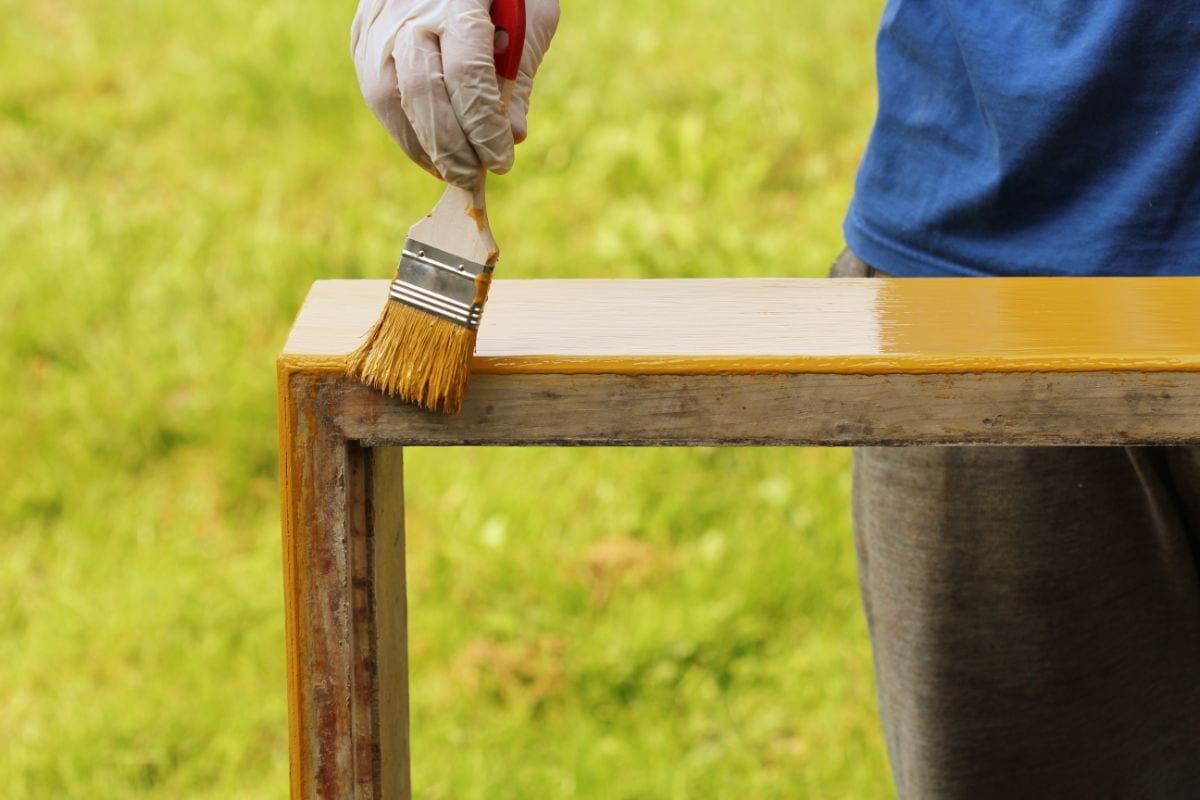
Painting Equipment
When it comes to painting a beehive, this task is not too different from when you are painting walls in or on a home. This means there are plenty of different tools and pieces of equipment you can consider to help get the job done.
You could use a roller or a paintbrush, however, since there can be some awkward spots, it is worth noting that even if you are using a roller, you might need to use a brush to get some more awkward spots as well.
You will also need trays and liners to make the task more manageable as well.
If your paint can has not been opened yet, you will likely need to use a paint can opener. If you are looking to get a specific effect from your paint job, it is worth using paint tape to ensure that the edges are clean.
Then, you can also use sandpaper or a scraper to get rid of any scraps of glue or debris from before painting. You do not need to use all of this equipment, but it is worth considering to have the best time while painting and to get the best results.
Clean And Prepare The Hive
One of the most important steps when you construct your hive is to ensure that it is properly clean before you start painting. Because of this ensure that there is no dirt or dust on the wooden beehive, this will ensure that there is nothing that will stop the paint from adhering onto the wood.
If you are going to be repainting an older box, before you start work, we recommend doing any fixing which needs to be done. This is where sandpaper will come especially in handy!
Exterior Only
When you are painting your wooden beehive, it is worth noting that you only paint the exterior of your wooden beehive, since this is the only part of your hive that is getting exposed to the elements.
The exception to this is that you do not want to paint the entrance reducer.
This is because even painting a thin layer of paint onto this part of the wooden beehive will make it a lot more difficult for the bees to use, and there is a chance that they could chew on the potentially toxic paint.
You will want to ensure that you are leaving the interior of your hive unpainted as this will only add chemicals to the hive and will not do anything to protect the outside of the hive.
As with the entrance reducer, there is also a chance that the bees will try and chew through this paint and the VOCs will likely have a negative impact on the bees.
The only exception to this is potentially painting the bottom board since this does catch moisture as well as other debris so painting this can actually add some more protection to the beehive.
As well as this, keep in mind that you should not paint the frames or the inside of the covers and only paint the exposed part of these covers. You should think about whether you want to paint the hive edges.
These are a prime point for water penetration into the wooden beehive, however, we usually choose not to paint this part of the hive since the summer heat can make these edges stick together and this will make the paint stick together.
When To Paint Your Hive?
It is important to try and paint your wooden beehive before you have any bees in them. This will of course will make the task of painting the beehive a lot easier, and it will also make sure that the bees are not getting prolonged exposure to the paint fumes.
You also will want to not have bees flying around while painting, especially since they can quite easily get stuck in wet paint.
It is possible to paint your wooden beehive while the bees are already in it, but we still recommend not doing this since it causes a lot more trouble.
You generally want to paint your hive when it is a good distance from your apiary and quite a while before you choose to use the wooden beehive.
We will try and paint our hive during some nice weather and give them at least a week to dry and let any VOCs off. It is also a good idea to have some spare painted boxes to hand just in case you need them.
Best Color Choice
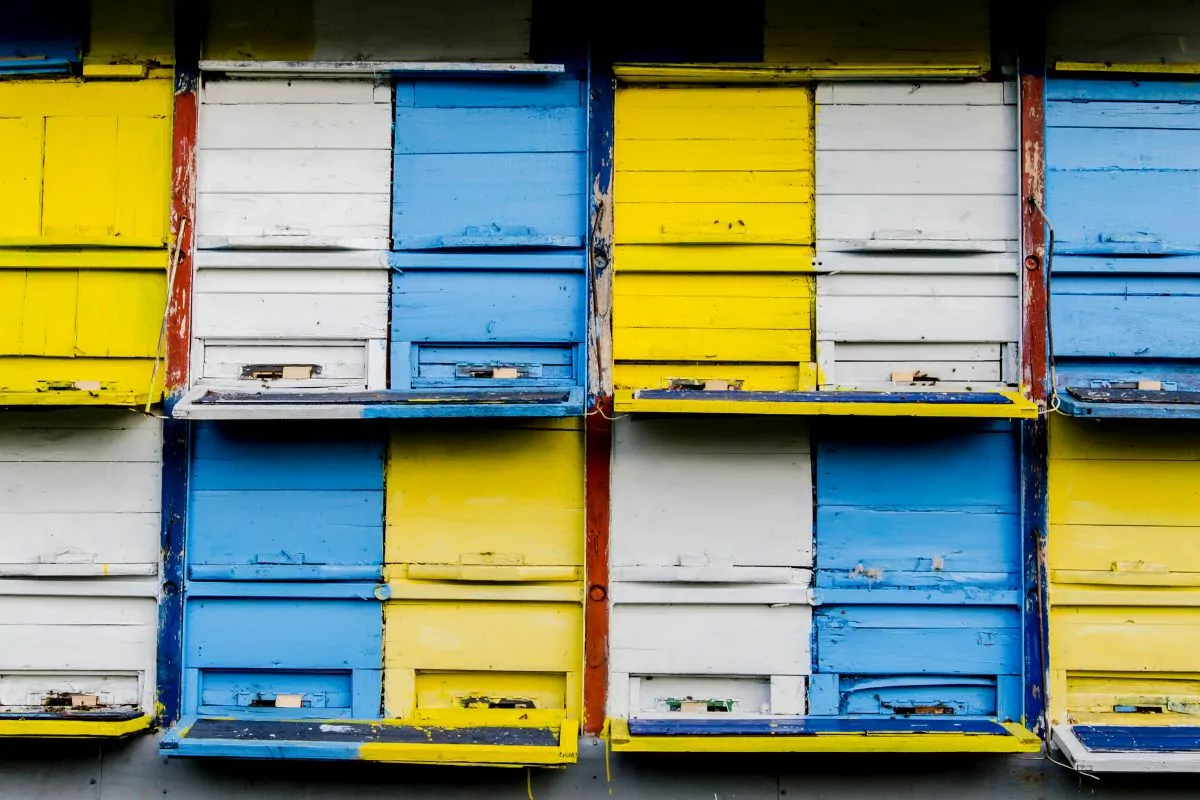
It is worth keeping in mind that the best color for you depends on taste, and you do not need to make your wooden beehive any specific color. However, you will generally find that wooden beehives will be painted white.
This is also why you will find that most pre painted wooden beehives are also white. As we mentioned earlier, the reason why white is such a popular color choice is because it reflects light and it will aid in keeping the wood cool in the summer months.
You can also go for an alternative color choice that will help your wooden beehive blend in.
If you live somewhere where people or passersby will be able to see your beehive and you would much rather they do not, choosing a color with a low sheen that will blend in is recommended.
However, we find that brighter colors usually look great and compliment the surrounding, but this is only really viable if you do not have to worry about vandals or nosey neighbors.
How Bees Experience Color
When you are choosing a color for your wooden beehive, you will also want to keep in mind how the bees are seeing the color and how this will affect their ability to orient themselves to the hives and the surrounding environment.
This is where it is worth pointing out that the colors bees can see is actually a little different from what we see as humans.
An example of this is red being outside of the visible wavelength for bees, so this color appears as black to them. But they can also see ultraviolet colors that we can not, so keep this in mind!
This is why we would not recommend painting your wooden beehive red as it will not really stand out to the bees. Also, keep in mind how painting your wooden beehive affects your budget, so if your wooden beehive is already painted, then maybe just consider leaving it the color it arrived as.
However, if you are choosing to paint, then do not feel limited and be as creative as possible. Like, there is no reason why you have to paint your wooden beehive in solid colors.
This is why we recommend looking online for inspiration. You do not even need to be inspired by other wooden beehives and you can look at any painting with patterns or bold colors to express yourself with your beehive.
This is especially fun if you have kids since painting your beehive can be a fun group activity. However, if you want to get a specific clean look, then maybe keeping kids out of the equation is a good idea.
Expected Cost?
While we have mentioned the budget a couple of times in this guide, you do not have to worry too much about the budget since, especially if you are not going for anything specific or fancy, you will usually not end up needing to spend too much.
It is worth noting that you can usually get around 250 square feet from a gallon of paint. This makes it relatively simple to work out how much your project will cost.
All you have to do is work out how many square feet you need to paint for the project, and then compare this to the 250 feet you get from a gallon of paint.
Of course this figure changes depending on the type and consistency of your paint, however, most paints should actually advertise how much coverage you can get from a certain size can or container.
If you are only painting one wooden beehive, you can actually do the whole wooden beehive for not that much money. This is of course a worthwhile cost since it does a lot to prevent your wooden beehive from rotting and needing to be replaced.
Alternatives?
So, you want to protect your wooden beehive but you do not want to have to paint it. This could be because you do not like the appearance of a painted wooden beehive, or because you hate painting.
Luckily there are other options. For example, you can consider staining your wooden beehive. This can help protect against the UV of the sun and does also resist moisture. A slightly less common method is wax dipping your hive bones in wax to protect it.
However, this method is not the most accessible method due to all the equipment that is needed.
Summary
Hopefully this guide has given you all the information you need to know (see also: Knowing The Correct Langstroth Hive Dimensions – An Easy Guide)what you need to know about painting a wooden beehive. There is plenty of advice to keep in mind.
But we recommend looking for some inspiration to start off, and to strongly consider painting due to all the money you can save because of the protection!

Being an avid bee enthusiast, I know the importance bees have on our climate and planet. That is why I try to educate others about bees, how they survive, and how we can make their lives easier through the process of beekeeping.
I also ensure that the colonies on the farm are protected at all times.
- Do Bug Zappers Kill Bees? Completely Explained - April 9, 2024
- Does Brake Cleaner Kill Bees? Full Explanation - March 20, 2024
- Do Bald-Faced Hornets Kill Honey Bees? & How to Protect Them - March 4, 2024