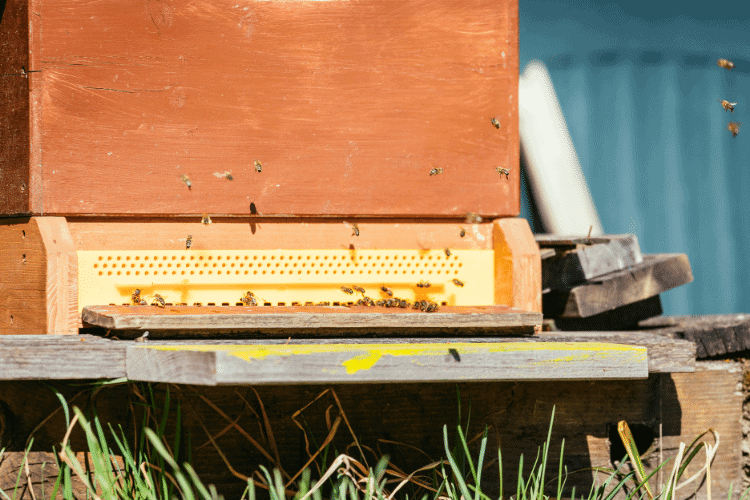
The warm humid air inside a beehive will naturally rise up and exit the beehive. However, when it’s cold outside, the air is cooled down immediately as it exists, and cold air doesn’t hold moisture well.
As a result, the moisture (water vapor) condenses at the top of the hive and starts to drip down on the bees, causing a lot of problems.
Luckily, there are various ways to manage excess moisture in the beehive, such as moisture boards and quilt boxes. So which one of them is better?
In today’s guide, we’ll provide you with a brief overview of the two and how to make them, so you can pick the one that suits you best!
Why Excess Moisture is Bad for Bees
Naturally, bees use a combination of methods to control the temperature and humidity within the hive.
When the internal humidity is low, honeybees fan humid air from outside into the hive. They can also release water into the hive and use their little wings to fan the moisture to spread it evenly into the hive cavity.
On the other hand, when moisture is slightly high, they use the fanning technique to expel that moist warm air outside of the hive cavity. However, if the air outside is too moist, this technique can be a bit lacking, causing a lot of moisture-associated issues. Here’s a quick look at them:
- Promotes the growth of mold inside the hive, which can cause many beehive diseases and infestations
- High humidity causes respiratory issues for bees
- Condensed water chills the brood significantly, slowing down their activity and might cause many of them to die of hypothermia.
How Do Moisture Boards for Bees Work?
Moisture boards are among the most popular moisture management techniques that beekeepers use to regulate moisture inside a hive. They go by a variety of names, including “moisture boxes” and “hot boxes”, to name a few.
The idea behind moisture boards for bees is fairly simple. They’re made of a moisture-absorbent material that will capture the rising moisture and prevent them from condensing and dripping back onto the bees.
Instead, the moisture board will regulate the humidity by releasing that excess moisture back into the hive when the air starts to dry out or wick it to the outside through the sides, depending on the difference in climates.
Moisture boards are usually made from materials like cellulose fibers (known as homasote), wall boards, or any other material with high absorptivity. You can also buy them online and cut them to the size of your beehive top.
Pros
- Readily available online and comes at a highly affordable price
- You can easily build it yourself, even if you have little to no DIY skills
- Doubles as an insulator that keeps the bees warm in winter (prevent heat from escaping the hive)
Cons
- Gets soaked easily with rain, so it requires continuous care and maintenance
- Frays easily, so you’ll need to replace them more often
How to Make a Moisture Board for Bees
As previously established, you can easily buy moisture boards at standardized sizes, and you can easily build them yourself. Here’s how to make a DIY moisture board for honeybees:
What You’ll Need
The most important item to make moisture boards is the material you’re working on, which is homasote boards.
You can find them both online and in hardware stores. Make sure that you buy standard thickness boards (about 1/2 inch thick). Alternatively, you can use other sturdy absorbent materials like wallboard fiber.
You’ll need to measure and cut the homasote to size because it comes in large boards, so you should prepare the following items:
- Measuring tape or ruler
- Marking tools like pen or pencil
- Jigsaw or regular saw to cut the board
- Chisel
The Process
Now that you’ve prepared all the necessary items to make a DIY moisture board, here’s a simple step-by-step guide that shows you how to make one:
- Measure the length and width of your beehive so you can cut your moisture board to size.
- If you’re working with a standardized beehive, it’ll typically measure 16 x 20 inches. Since the board is usually large, you can cut it to get multiple pieces that size.
- Measure the board’s long side and mark the edge of the board every 20 inches, then repeat the same step on the shorter side and mark the edge every 16 inches.
- You can use the pencil and ruler to make guidelines showing you how to cut the board into multiple 16 x 20 inches
- Now that you have an outline of what you want to cut, use your fine-toothed saw to cut the boards. Homasote is easy to fray, so make sure you’re using a fine-tooth saw to avoid creating rough edges while cutting.
- Using the chisel, carve a lengthwise groove in the center of the board to allow the board to expand as it fills up with moisture. The groove should be about 1 inch wide and 3/8 inches deep. Make sure that you’re careful not to carve too deep or too shallow.
- Place the moisture board on top of the beehive instead of the inner cover.
How Do Quilt Boxes for Bees Work?
A quilt box uses a method similar to moisture boards to provide humidity control for beehives. It’s simply a wooden box that sits on top of your top box or candy board (between the hive body and the inner cover).
This box contains a quilting material, such as wood shavings (especially pine and cedar), pine needles, burlap, or other loose fibrous materials that can absorb moisture well.
The quilting material is kept inside the box by a barrier on one side of the container to keep it separated from the beehive frames.
You can use a feeding shim along with the quilt box if you want a top entrance for the bees, as they can’t pass through that box.
As the moisture rises from the beehive, it comes in contact with the absorbing material inside the quilt box before it meets the cold air. The quilting material then absorbs the excess moisture and releases it into the air.
The size of the quilt box depends mainly on the outdoor climate where the beehive is left. Ideally, quilt boxes are usually 4 to 8 inches high
Pros
- It can last for a long time with little maintenance, compared to moisture boards
- Excellent Moisture Management (absorbs more moisture than boards that can get soaked quickly
- Adds an aesthetic appeal to the beehive because you can paint them
- Doubles as an insulator
Cons
- More expensive than moisture boards (but can be highly cost-effective if you’re building it yourself)
- Assembling a quilt box can be tricky, especially if you’re building yourself
- Needs proper monitoring and treatment against pests (you can reduce this problem with the trick provided below
How to Make a Quilt Box for Bees
Now that you know more about quilt boxes, here’s a brief guide that shows you how to make one yourself.
What You’ll Need
To make a quilt box, you’ll need to choose the right quilting material. We highly recommend wood shavings because they have the best absorptivity. Additionally, you’ll need extra materials to help you make the box, such as:
- Any wooden box frame, preferably an old (retired) shallow beehive box
- Hardware cloth to create the barrier
- Drill to make ventilation hole
- Tacks to fix the cloth
- Screen mesh with holes small enough to prevent insects from passing.
The Process
- Mark and cut the hardware cloth for the quilt box so that it’s at least 1.5 inches larger than the shallow box you’re using for quilting.
This gives you some extra material to work with while folding and attaching the cloth to the edges of the box. Make sure that the cloth is stretched properly to avoid sagging into the hive.
- To allow the moisture collected by the wood shavings to escape, you’ll need to drill ventilation holes into the sides of the box.
- While drilling the holes (about 2 or 3 on each side) adjust the drill so that the holes are angled downwards. This prevents the rainwater from seeping into the box.
- The holes don’t have to be huge, but they should be large enough to allow free airflow while preventing insects from going inside. For extra assurance, you can cover the sides with a mesh screen small enough to prevent insects from crawling inside.
Final Thoughts: Which One is Better for Bees?
As you can see, both moisture boards and quilt boxes have their advantages and drawbacks when it comes to moisture control and overwintering the bees.
For instance, moisture boards are a perfect choice if you’re on a strict budget and looking for a relatively simple method to protect the bees. However, you’ll need to keep an eye on them more regularly to make sure that they’re not heavily soaked.
On the other hand, quilt boxes are more durable options that might cost you a bit more effort and money to build. However, it’s a reliable solution that provides much better moisture control and also insulates the hive during the winter.`

Being an avid bee enthusiast, I know the importance bees have on our climate and planet. That is why I try to educate others about bees, how they survive, and how we can make their lives easier through the process of beekeeping.
I also ensure that the colonies on the farm are protected at all times.
- Does Bleach Kill Bees? - April 23, 2024
- How Do I Get Rid of Ants Without Harming Bees? - April 16, 2024
- Do Bug Zappers Kill Bees? Completely Explained - April 9, 2024